RivaTuner 2.0 - Creating Overclocking Profiles
Creating Overclocking Profiles
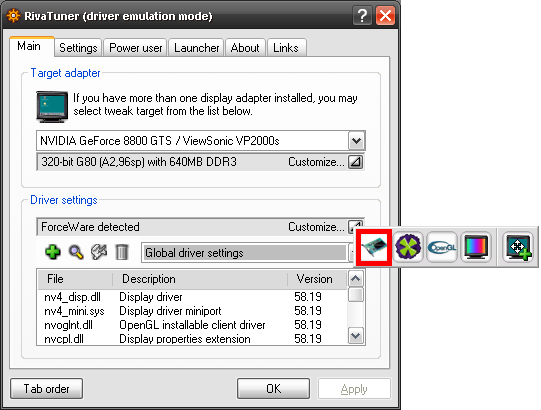
You should now be more familiar with the basics of RivaTuner. Proceed to the Main window tab and select the graphics card looking icon from the second arrow box down.
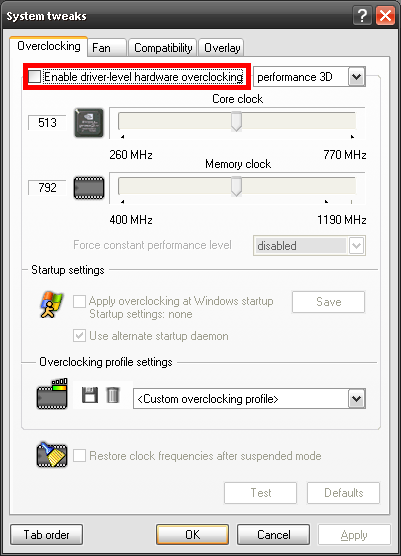
Then click the checkbox next to Enable drive-level hardware overclocking.
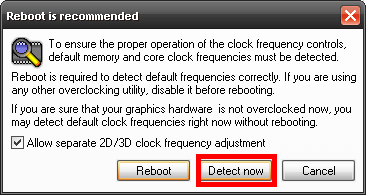
You will then be prompted to Reboot or Detect now. Go ahead and select Detect Now.
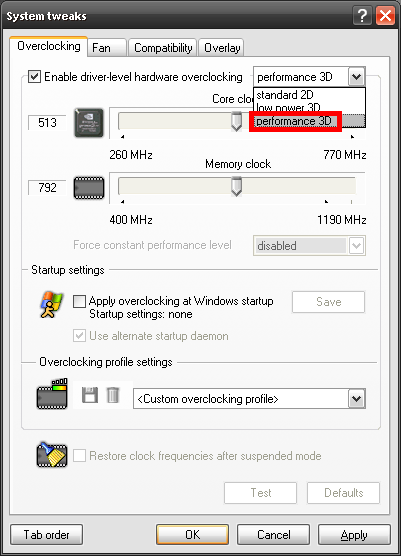
The program should detect your current core and memory clock and allow you to change their speeds.
Select the drop down box in the top right and select performance 3D.
Next drag the arrows next to Core clock and Memory clock. It's usually best to try small increments first to see if the graphics card can handle it. Also, you may want to check a game or benchmark application for any artifacts or glitches in the video.
In this tutorial, I am using a eVGA 8800 GTS and Rivatuner reports my speeds as 513/792. I am going to change the speeds to 620/1000 as that represents the speed of eVGAs 8800 GTX Superclocked. You can also look up what other people have obtained as a reference for possible configurations.
So, change the speed to the desired position. This tutorial will use 620/1000??. Then click the Test button towards the bottom of the window.
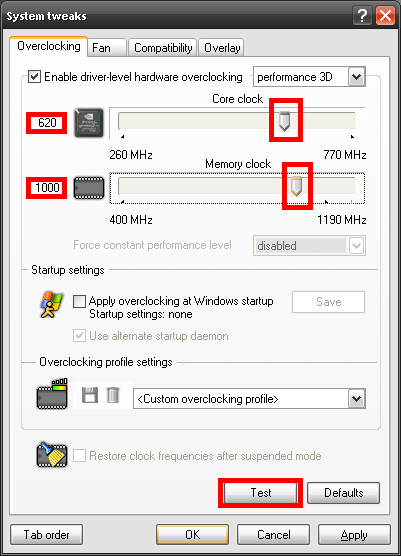
Hopefully the test was successful. If not, try lowering it.
Next click the Apply button, so that we can save this to a profile.
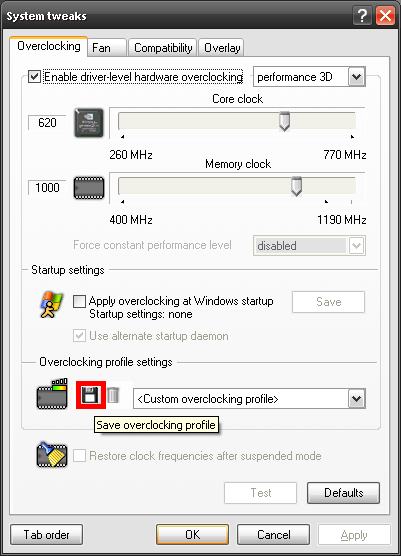
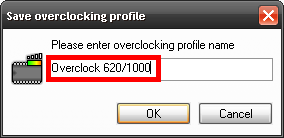
Go ahead and name the profile. I usually choose the Core Clock/Memory Clock.
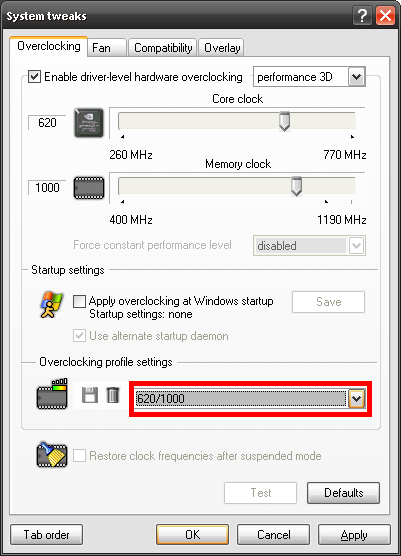
You should now have that option available to you in the drop down box. So, you can return to it later.
Finally, if you desire you can create a launch item to call that profile, so it can be accessed through various RivaTuner controls: select it from the system tray Launch menu, switch to it if a temperature is low enough, etc.
