RivaTuner 2.0 - Configuring Automatic Fan Control
Configuring Automatic Fan Control
Go back to the Main tab where we originally started. Click on the arrow box next to Customize next to the second text box on the application. Then select the icon that looks like a magnifine glass over an IC.
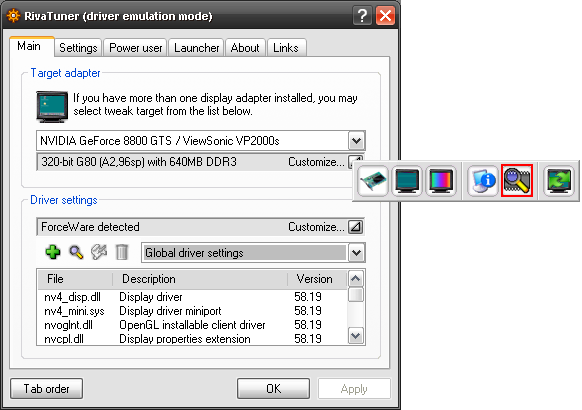
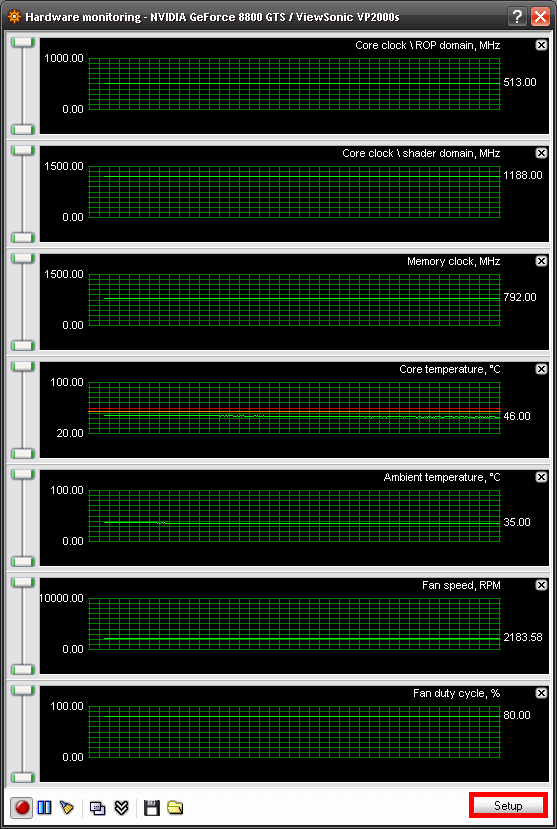
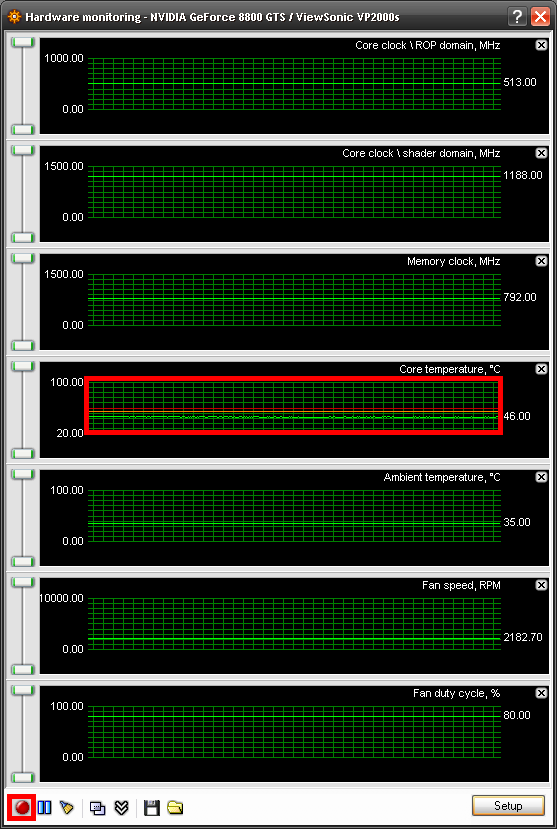
This will bring up a new Hardware monitoring window that you can view various information about your graphics card: core clock mhz, memory clock mhz, core temp, ambient temp, fan speed rpm, fan duty cycle (speed).
Click on the Setup button on the bottom right to proceed to the next step.
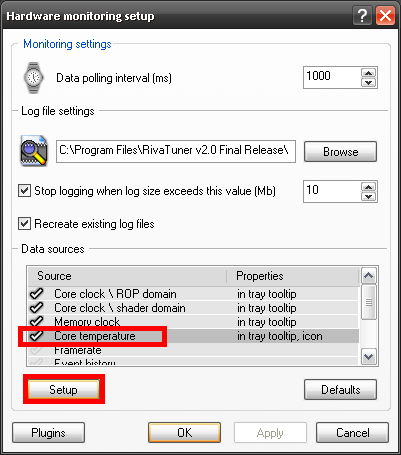
After you've clicked the Setup button you can now configure options for the hardware monitoring function of Rivatuner Scroll down the list and click on Core Temperature and then click the Setup button towards the left.
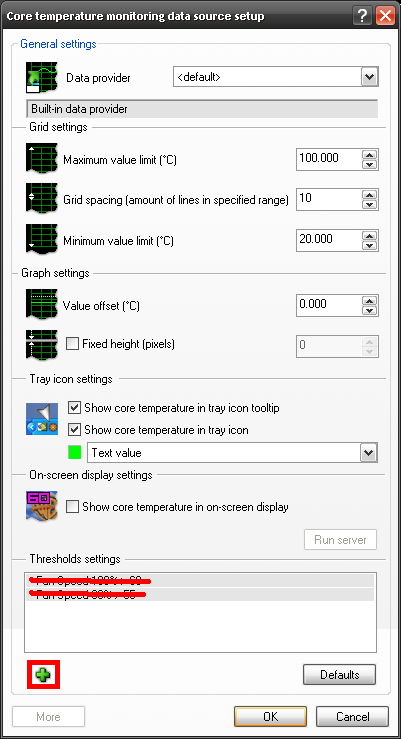
You can now configure options related to Core temperature. I've changed the gMaximum value limit to 100.000 and the Minimum value limit to 20.000. I've also clicked the check boxes Show core temp icon tooltip and Show core temp iconh. The first checkbox will show the temperature read out when you hover over the Rivatuner icon in the system tray. The second icon will have an icon in your system tray showing a numeric value or bar graph representation of your GPU core temperature.
To proceed to the next step click the Add button (plus sign) (Again, ignore any crossed out text).
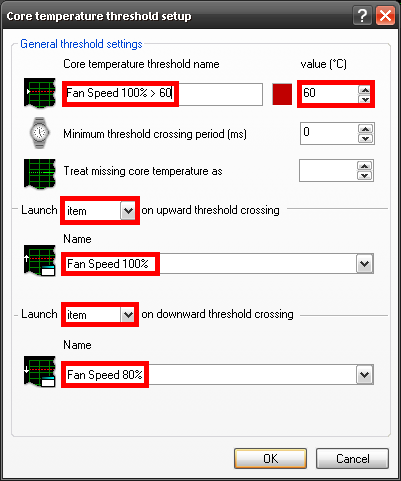
Begin, by typing in the name of Core temperature threshold. For this tutorial I will be using Fan Speed 100% > 60. Then change the value C to 60.
I've also changed the color to red here. (should be red by default)
Next, click the drop down box next to Launch and click item. (Launch item on upward threshold crossing)
Then select the launcher item Fan Speed 100%.
Click the next drop down box and select item. (Launch item on downward threshold crossing)
Then select the launcher item gFan Speed 80%
Basically, this will tell Rivatuner that if the temperature of the graphics card exceeds 60 degrees celsius (61) then launch the item Fan Speed 100%, which calls the fan profile we made Fan 100%. If the temperature falls below 60 degrees celsius (59) then it will launch the Fan Speed 80% item.
Click Ok, and then click the Add button again (plus sign) .
We are now going to configure for another temperature change.
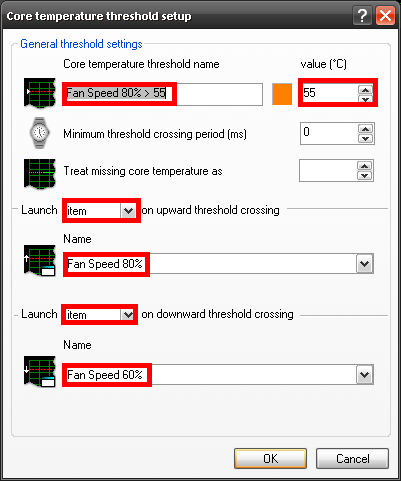
Fill in the name Fan Speed 80% > 55. Then change the value C to 55.
I've set the color to orange here.
Next, click the drop down box next to Launch and click item.
Then select the launcher item Fan Speed 80%.
Click the next drop down box and select item.
Then select the launcher item Fan Speed 60%
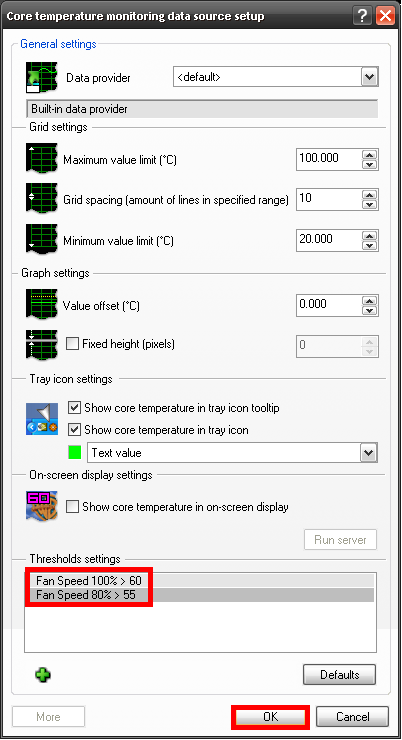
Click Ok.
Congratulations!!
You will have now configured RivaTuner to change the Fan Speed of your graphics card based on the temperature. If it's greater than 60C then Fan Speed 100%. If it's greater than 55C then change to Fan Speed 80%. You can configure this in anyway you choose; higher temperature or multiple entries with multiple fan profiles.
If you look at the Hardware monitoring window now, you should see 2 lines on your Core temperature section that are basically just markers. I also recommend that you click the Record button on the far left (red circle). To keep the monitoring continueing in the background even if this window is closed.
Another nice feature, now that you have your launcher items created, is the ability to call the items through the system tray icon.
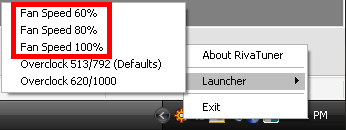
You can also call Overclocking profiles, which we will discuss next.
